Installation
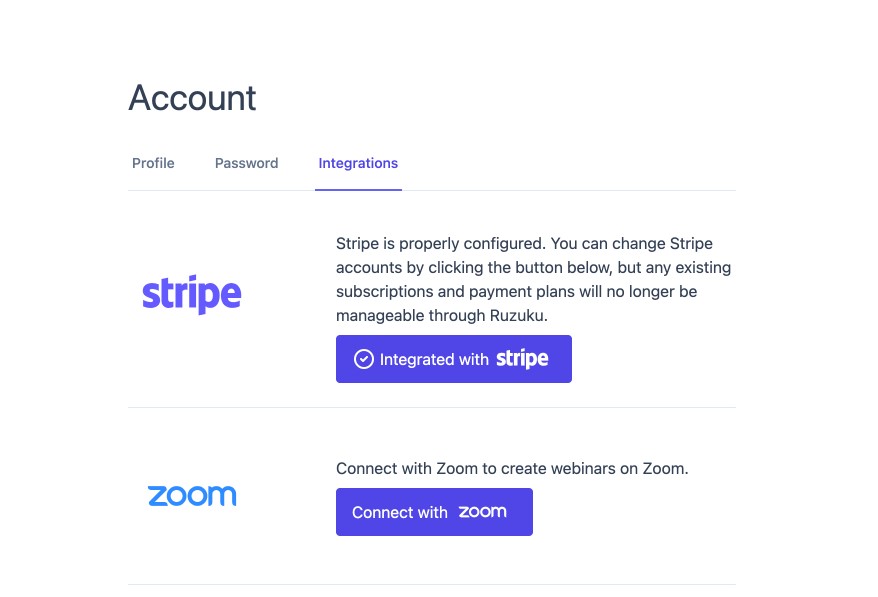
1. Click your initials from the top right corner of your screen and choose Account

2. Select Integrations
3. Click the blue button to connect with Zoom
You’re done! You can now select the Zoom meeting option when creating a meeting in your course. Read on for initial setup instructions.
Usage – Initial setup
After your Zoom account is integrated, you can choose a Zoom Meeting when setting up a meeting.
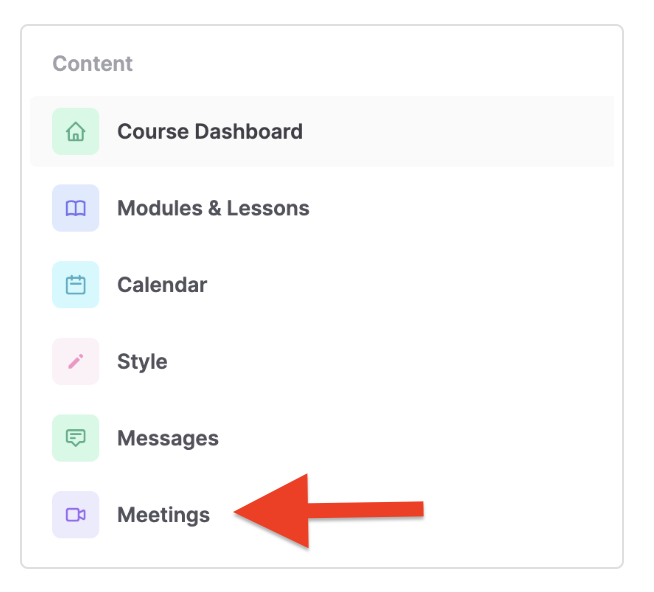
1. Select Meetings from the course management menu
2. Choose “Create Meeting

3. Under “Choose the meeting type,” select Zoom

4. Click “Create Meeting”
Usage – Starting a meeting
- At the time of the scheduled Zoom meeting, select Meetings from the course management menu

- Choose the upcoming meeting you’d like to start

- Click the blue “Start Meeting” button (available 30 minutes before scheduled start time

- You will be re-directed to Zoom in a new browser tab and asked to launch the Zoom application

- End the meeting normally through Zoom
Recordings
The platform may automatically store your meeting’s recordings when you record a meeting and choose Record to the Cloud. Students may replay those video later on the meeting detail page.
Please note that we’re only accepting the video recording and chat room transcripts.
Troubleshooting/FAQ
Q: I see “Failed creating the Zoom meeting.” error when I click on “launch meeting.
A: Please try re-integrating your Zoom account into Ruzuku app on the integrations page.
Q: Why can’t I see my meeting’s recordings on the meeting detail page?
A: It should appear on your meeting’s page if you recorded with the “Record to the Cloud” option on Zoom. Please note that it might take a couple of hours for your recording to be ready depending on the meeting’s duration.
Q: What can I do if I recorded my meeting locally?
A: You may upload the recording to the meeting description editor manually to make it available for all students.